


This article will be covering the aspects of How to Upscale Video in DaVinci Resolve with Super Scale.
With upscaling, you can improve the resolution of your video, add and sharpen details, and make the footage less pixelated, thus turning your low-quality video into high quality and high resolution.
I will walk you through how to prepare your video, applying Super Scale settings, and useful ways to get the desired results in an efficient and effective manner.
What is Super Scale in DaVinci Resolve?
Super Scale in DaVinci Resolve is a sophisticated AI-powered tool for improving the definition and quality of your clips. Different from typical upscaling which stretches the pixels of a low-resolution clip, Super Scale employs smart algorithms that study the image, identify edges, and textures and details, reconstructing high-resolution frames that are clean and sharper.
It allows for artifact, noise, and detail loss when scaling footage by 2x, 4x, and 6x, which makes it perfect for old, classic videos that need content prepared for 4K and higher outputs.
Super Scale’s adjustable noise reduction and sharpening pre-sets are also a plus, allowing to adapt the tool to the source footage quality. Super Scale leverages the integrated DaVinci Resolve for seamless use with different formats and resolutions, clips and timelines.
Fine-tuned detail, edges, and motion makes Super Scale professionally upscaled videos scm with clean and appealing visuals and effort, bypassing time-consuming upscaling methods.
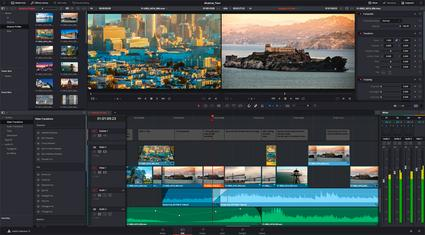
How to Upscale Video in DaVinci Resolve with Super Scale

Example: Upscaling a 1080p Video to 4K Using Super Scale
Step 1: Open DaVinci Resolve and Import Your Video
- Launch DaVinci Resolve.

- Go to the Media Pool and import your 1080p video clip.
Step 2: Add the Clip to the Timeline
- Drag the video from the Media Pool into your timeline.
- Make sure your timeline resolution is set to 4K:
- Go to File → Project Settings → Master Settings → Timeline Resolution
- Select 3840 x 2160 (4K UHD).
Step 3: Enable Super Scale
- Right-click the clip in the Media Pool and select Clip Attributes.
- Navigate to the Super Scale section.
- Set your options:
- Scale Factor: 2x (for 1080p → 4K)
- Noise Reduction: Medium (adjust based on clip quality)
- Sharpening: Medium or High (optional, based on preference)
Step 4: Preview the Upscaled Clip
- Apply the changes and scrub through the timeline to check the results.
- Zoom in to see details and ensure edges look sharp and natural.
Step 5: Render and Export the Upscaled Video
- Open the Deliver tab to proceed.
- Select your export settings:
- Resolution: 3840 x 2160 (4K)
- Choose MP4 or MOV for the Format
- Set Codec as H.264 or H.265
- Click Add to Render Queue then Start Render.
Step 6: Review the Final Output
- Watch the 4K video to confirm the quality is sharp and clean.
- If the quality is still not right, adjust the Super Scale settings and render again.
Preparing Your Video for Upscaling
Import Your Video into DaVinci Resolve
- Start up DaVinci Resolve and access the Media Pool.
- To import your video file, either drag and drop it or click on File → Import Media.
Check Project Settings and Timeline Resolution
- Click on File → Project Settings → Master Settings.
- Change the Timeline Resolution to your desired output resolution (e.g., 4K) and then the Timeline Frame Rate to match the source video.
Analyze Source Video Quality
- Establish your original footage’s resolution and how clear it is.
- Look for any noise or grain and compression artifacts that likely will impede the upscaling process.
Organize Your Clips
- For ease of access, rename and rearrange the Media Pool’s clips and use bins or folders when working with multiple clips.
Stabilize or Correct Footage if Needed
- To enhance the output for Super Scale, apply basic color correction, stabilization, or noise reduction prior to upscaling.
Decide on Upscaling Settings
- Depending on your target resolution, establish your desired Scale Factor (2x, 4x, 6x).
- Select initial settings for noise reduction and sharpening that best fit your clip.
Why Use Upscale Video in DaVinci Resolve with Super Scale
Video Resolution Enhancement
- Super Scale allows you to upscale videos to high resolutions such as 4K and 6K from lower resolutions such as 1080p.
- It makes videos appropriate for high-definition monitors and for upscaling professionally.
Image Clarity and Detail Improvement
- Super Scale enhances poorly shot videos by intelligently sharpening edges and restoring textures.
- Also helps in elimination of blur and retention of important details in your footage.
Noise and Artifact Reduction
- Super Scale automatically removes noise and helps in eliminating the compression artifacts.
- Thus, you achieve a cleaner and professionally looking video.
Time Efficient Compared to Manual Upscaling
- Super Scale uses AI technologies in the analysis and the reconstruction of the frames, thus saving a lot of time.
- This makes complex manual editing unnecessary.
Highlights Your Footage
- It greatly improves poorly shot and old videos to modern standards of viewing.
- It helps with archival footage, client projects, and YouTube videos.
Control Over Output
- Control over the scale factor, noise and sharpening allows for multiple adjustments.
- This will help you fit to the video and source files.
Tips for Best Results
Select a Suitable Scale Factor
- For smaller upscales, use 2x. For larger projects, use 4x or 6x.
- Do not use scaling factors that are higher than necessary to avoid artifacts or oversharpening unnatural detail.
Use Noise Reduction Sparingly
- For clean footage, use low or medium noise reduction.
- Too much noise reduction will soften picture detail, so be attentive to the quality in the video.
Sharpening Adjustments
- Fine detail improvement occurs without halos for moderate sharpening.
- Adjusting sharpening on a small section will allow for a less time-consuming approval process before the final video rendering begins.
Stabilize Footage First
- For footage that shakes, apply stabilization first before upscaling.
- This will help to increase clarity and lessen motion blur afterward.
Check Project and Timeline Settings
- Ensure the timeline resolution is in line with your expected output resolution (4K, 6K).
- Select the proper frame rate to maintain a smooth output without motion artifacts.
Render a Preview First
- Super Scale affects your video, render a short section to see how.
- Adjust settings in the render preview for artifacts and noise control.
Utilize Quality Source Footage
- Higher-quality original videos tend to yield better results post-processing.
- On the other hand, low-quality, low-resolution, or overly compressed videos will have very little to no improvement.
Optimize Your System for Render
- Make sure your system can support the demands of Super Scale as it is intensive on the GPU.
- To help avoid crashes and improve render speeds, close any unnecessary applications running in the background.
Common Issues and Troubleshooting

Blurry or Soft Output
- Cause: Overapplication of noise reduction or the use of low-quality source footage.
- Solution: Minimize noise reduction and sharpening to a small degree or use higher-quality footage.
Over-Sharpened or Halo Effects
- Cause: Sharpening too much in Super Scale settings.
- Solution: Reduce sharpening strength and try to preview small sections before a full render.
Slow Rendering or High System Load
- Cause: Upconverting to 4K/6K and higher resolutions which is GPU intensive.
- Solution: Upon ensuring that GPU drivers are updated, close unnecessary programs, and try to render in sections.
Artifacts in Motion Areas
- Cause: Unwanted distortion due to fast-moving subjects.
- Solution: Reduce scale factor slightly or apply and remove motion blurring on the footage before upscaling.
No Improvement in Quality
- Cause: Source video of very low-res or over-compressed source footage.
- Solution: Super Scale can only work with the low-res footage and boost it a bit. Consider better source footage.
Timeline Resolution Mismatch
- Cause: The timeline resolution does not equal the target output.
- Solution: Set the timeline resolution in Project Settings → Master Settings to the desired upscaled resolution to fix the issue.
Clipping or Color Issues
- Cause: Color grading and exposure settings may enhance some upscaling artifacts.
- Solution: Perform color correction before Super Scale and monitor previews closely.
Pros & Cons
| Pros | Cons |
|---|---|
| Enhances video resolution (e.g., 1080p → 4K/6K) | GPU-intensive; requires a powerful system for smooth rendering |
| Improves image clarity and detail using AI algorithms | Very low-quality or heavily compressed footage may show limited improvement |
| Reduces noise and artifacts for cleaner visuals | Over-sharpening or excessive noise reduction can create halos or soft edges |
| Saves time compared to manual upscaling methods | Large projects take longer to render, especially at higher resolutions |
| Offers control over scale factor, noise reduction, and sharpening | May produce artifacts in fast-motion areas if not adjusted properly |
| Ideal for restoring old or low-resolution footage | Cannot fully recreate lost detail in extremely low-quality videos |
| Produces professional-grade output suitable for broadcast or streaming | Requires proper preview and testing to avoid unwanted effects |
Conclusion
Upscaling videos using Super Scale in DaVinci Resolve is remarkable for boosting resolution and restoring detail for professional quality output. Super Scale enhances low resolution clips to high resolution and clear videos fit for modern display and streaming by smartly evaluating footage, noise reduction and focusing sharp edges.
Anyone can achieve a clear and visually appealing upscaled video keeping in mind proper settings, diligent preparation and optimization tips. Super Scale makes high quality upscaling effortless, especially when dealing with archival footage, client projects, and personal content.
FAQ
What is Super Scale in DaVinci Resolve?
Super Scale is an AI-powered upscaling feature that enhances video resolution, sharpness, and detail. It analyzes each frame to produce higher-resolution results with reduced noise and improved clarity.
Can I upscale any video using Super Scale?
Yes, Super Scale works with most video formats and resolutions, but higher-quality source footage produces the best results. Very low-resolution or heavily compressed videos may not improve significantly.
What scale factors are available in Super Scale?
DaVinci Resolve allows you to upscale by 2x, 4x, or 6x depending on your target resolution and project needs.
Will upscaling affect video quality?
When used correctly, Super Scale improves video clarity and detail. However, excessive sharpening or noise reduction may create halos or soft edges, so settings should be adjusted carefully.
How long does it take to upscale a video?
Render times depend on the clip length, resolution, and your system’s GPU performance. High-resolution upscaling (4K/6K) can take significantly longer.